After reading the title I think you are so confused. Probably, you are thinking about How to practice tattooing within 6 months, is it possible?

Or if you think it is a long time, many experts say becoming a professional tattooist needs to practice for a minimum of 1-2 years.
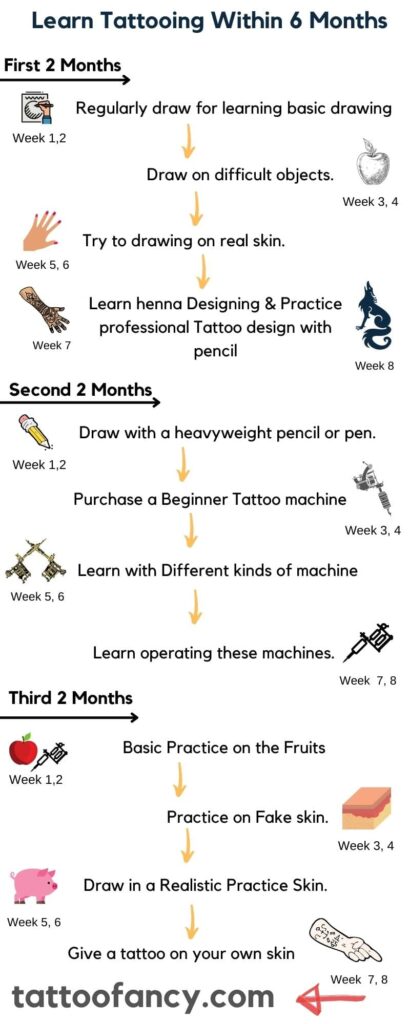
But I’m promising you that it’s possible within 6 months if you are a passionate guy. Below I’ve shared with you 3 step guides, that are mentioned with months and weeks. If you spend 2-3 hours per day constantly practicing and following this guide, the tattoo Industry welcomes you.
Tattooing is an art and design hence without practice it isn’t possible to get success. Practice is everything, but smartly you have to follow a few guides. Without these probably you have to spend extra time, so this guideline will help you to reach your goal early.
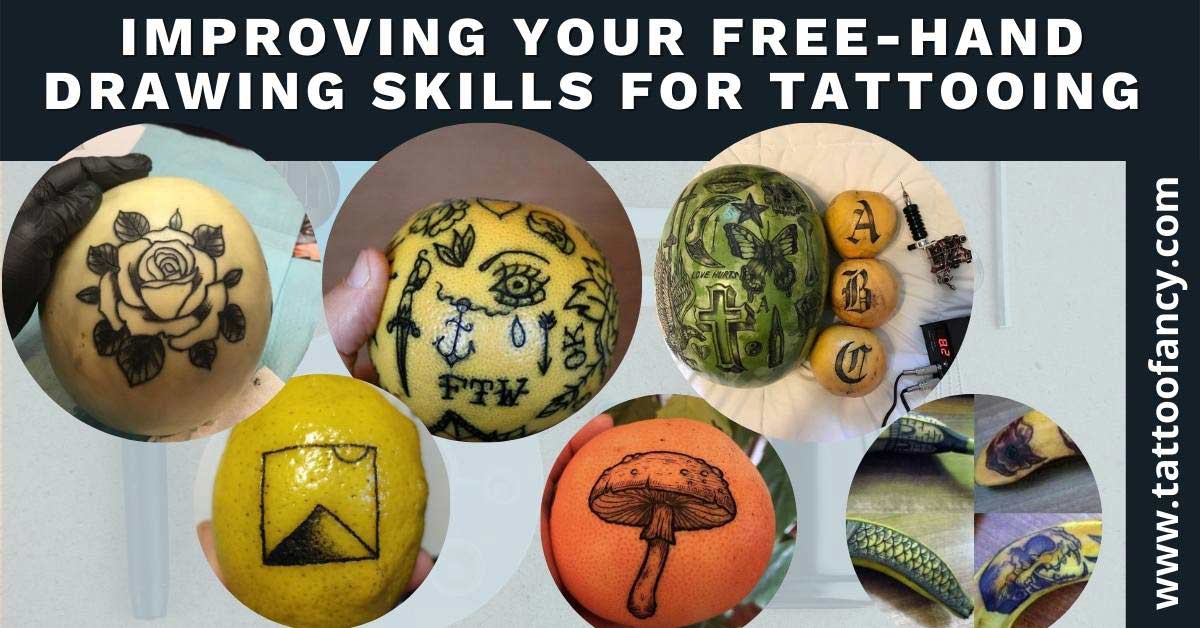
First 2 Months: Improving your free-hand drawing skills for tattooing

A Tattoo artist is a professional designer too. So your first challenge is to make yourself a pro-level designer with the freehand sketch. First two months you have to constantly draw in the different styles and ways (these are below).

Week 1, 2: Regularly draw for learning basic drawing.
If you want to take Tattooing professionally, you have to draw as your client expects. So a tattoo expert is always a free drawing expert.
To grow your freehand drawing skill you have to try to draw difficult designs on white paper. This will make you master any difficult design that your client will want. Also, as a professional artist before designing on real skin, you need a sample drawn on white paper.
Week 3, 4: Draw on difficult objects.
The body part isn’t flat like white paper. So drawing on the skin and paper isn’t the same. To overcome this problem you have to practice drawing on the curved or uneven object.
So you can draw by pencil on the vegetable and fruit, like Apple, Orange, Carrot, etc. I will help to be an expert designer on any uneven body part.
Week 5, 6: Try to draw on real skin.
After completing practice as well on white paper and uneven objects, you have to practice on real skin. Stop! I’m not talking about going for tattooing.
You can use a pencil or a non-toxic marker for it. This week bring control that how to practice tattooing on yourself. try to make a small design, and smoothly draw lines on the skin.
Warning: Don’t use permanent, Toxic Marker pencils, it will make injury to your skin.
Week 7: Learn henna Designing.
This sounds listening like funny, but I swear it will help to bring more control yourself for body drawing. The henna nozzle isn’t the same as a pencil or marker. Although it is a little difficult than a pencil, you will ahead one more step toward the tattoo machine operating.
And by pencil drawing, you can do well practice for the solid line but you have to be an expert for shadowing also. So this week you will practice as well for shadow lines.
Week 8: Practice professional Tattoo design with pencil.
First 7 weeks or almost 50 days you will do randomly design to become an expert. But you know tattoo design is much different than any other draw. Cause here has special lines and shapes that will look excellent on skin.
You will see that same design’s Tattoo and a simple photo looking a little different. So now you need to practice real tattoo designing. But this isn’t time to go for practice with an instrument.
Collect some difficult and standard Tattoo designs on white paper, and re-draw these designs’ lines with a deep black pencil. After completing 10-15 designs you will familiarize yourself a little bit with professional Tattoo design.
Second 2 Months: Become used to Tattooing Instruments.

If you are well at freehand design it’s too good. A tattooist is a good designer too. But a normal designer isn’t a good tattoo expert. Cause, as a professional artist you have to operate a machine under pressure. So this knowledge is too much important and tough for you. The 2nd two months is a big challenge to an understanding of tattoo machines.
Week 1, 2: Draw with a heavyweight pencil or pen.
You know a Tattoo machine isn’t lightweight like a pencil or marker. After being an expert artist too with a pencil, Marker, Pen, or Paintbrush you can’t design with a tattoo machine. Because you can not operate it and will feel a huge difference.
And before starting with a machine this is a great suggestion from many experts to draw with a heavy-weight pencil. But you know a pencil is too lightweight. So add 4-5 metal bolt nuts on the pencil body, and stuck them with rubber. Now your pencil is heavyweight, that is a tattoo machine.
Week 3, 4: Purchase a Best Beginner Tattoo machine.
After spending a huge time practicing without the original machine, now the time to buy the best tattoo machine for practice. I won’t recommend taking a professional model for the first time.
As it is much more expensive than a beginner model, and it operates too difficult for a learner. Also, the practice machine comes with all the kits that you need, within a package under the lower price.
Week 5, 6: Learn with Different kinds of machine
There are many kinds of machines for designing tattoos. If you want to work only with a machine it’s not possible. With some types of machines, you can draw all shape lines but it can’t be done professionally.
You have to be an expert on all kinds of machines. But as a beginner it’s too expensive, so try to purchase a cheap model of good quality.
The tattoo machine type and their operations:
- Coil Machine: Uses professional artists, and it has different models for lining and shading. During operation, it makes too much vibration.
- Rotary: This machine doesn’t make huge vibrations like Coli. This machine can be draw lines and shadows both. But it isn’t perfect for professionals, all experts recommend it for practicing purposes.
- Liner: Dedicated for Line drawing.
- Shader: Dedicated to shadow drawing.
Week 7, 8: Learn to operate these machines.
Tattoo Machines make much vibration during the run, so it is too hard to grab, and drawing is more difficult. So first you have to learn how you can hold it easily under high vibration. Also, these machines have rules for easy holding techniques. You will find these guides and tutorials on Youtube. Or if you have a mentor it is greater.
Third 2 Months: Finally, practice with a Tattoo Machine
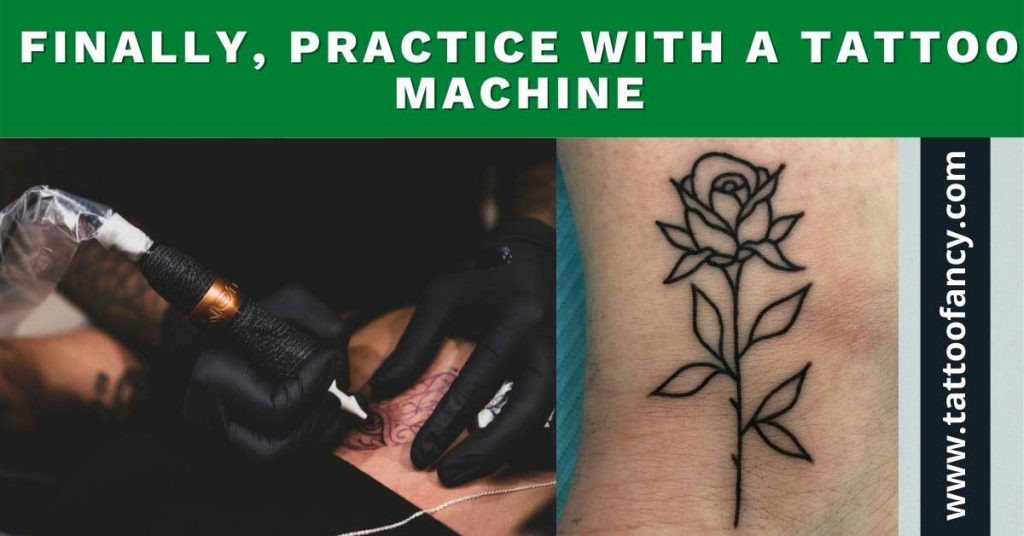
A machine’s design tattoo isn’t temporary. So before starting design on real skin, you have to practice many different ways. So that you can do it professionally without bad experience. These two months are the final guide for you that will make you a real expert.
Week 1, 2: Watch and Basic Practicing
After completing 4 months later with these tasks, you will be ready to practice with the real tattoo machine. I’ve two suggestions here, either go near an artist or follow the video tutorials (Paid or Free). You will find a lot of free professional video cutter learning on Youtube.
Continuously see tutorials and practice on fruit with the machine. Try to give as professional a design as possible. Although the first time it’s too difficult, try for well.
Week 3, 4: Practice on Fake skin.
After completing 2 weeks with fruit now try to design on fake skin. If you take a beginner package machine It will include fake skins. But probably there don’t have many pieces and purchase more fake skin separately.
Continuously drawing solid lines and shadows on these fake skin until you think design isn’t like a professional. Don’t go directly with real skin before doing here expert drawing. These two weeks are a big challenge for you.
Week 5, 6: Draw in a Realistic Practice Skin.
After complete practice, fake skin isn’t safe to go directly on the real human body. So you have a more realistic practicing option for you. Purchase a real pigskin. Pigskin is 90% the same as human skin, so when you practice on it you will feel more comfortable.
I’m suggesting to you the best careful way. Cause a Machine’s drawn tattoo isn’t temporary. So before jumping on real skin, first 5-6 months you have to do the hard practice.
Designing on pig skin is your final practice step. So take time and much practice, until you feel confident in yourself like an expert.
Week 7, 8: Give a tattoo on your own skin:
Stop! Still a step for you, but it is theory. You have to understand humans skin. Skins have 3 layers with sublayers. For tattooing, you have to insert the machine’s needle middle of 2nd layer. It can be the highest 1-2 mm deep. If you insert it deeper, your client will get much pain and it can cause infection.
So my recommendation is to draw the first design on your skin. You will understand how deep you are inserting the machine’s needle and its pain. Also, you will get much confidence in yourself about your work before taking it professionally.
Five-way “How to practice tattooing without a machine”

1. Use a needle and thread to create a basic outline of the tattoo design on the skin.
- If the tattoo design is small, you can use a regular sewing needle. If the tattoo design is large, you will need to use a needle that is designed for embroidery.
- Select a color of thread that will contrast with your skin tone.
- Tie a knot at the end of the thread to secure it.
- Insert the needle into the skin at the edge of the tattoo design.
- Pull the needle through the skin and then make a small stitch in the tattoo design.
- Repeat steps 4 and 5 until you have gone around the entire tattoo design.
2. Use a sharp object to etch the outline of the tattoo into the skin.
First, find a sharp object that can be used to etch the outline of the tattoo into the skin. A sharp needle or a razor blade will work well for this. Next, sterilize the sharp object by wiping it down with rubbing alcohol. Then, outline the tattoo on the skin with the sharp object. Be sure to go slowly and be careful not to make the lines too deep. Once the outline is complete, the tattoo can then be filled in with ink.
3. Use a small paintbrush or pen to fill in the tattoo design with ink.
Decide on the tattoo design you would like to have and where you would like to place it on your body. find a small paintbrush or pen that you can use to fill in the tattoo design with ink. begin filling in the tattoo design with ink, being careful not to go outside the lines. Once the tattoo design is filled in with ink, allow it to dry completely.
You now have a beautiful tattoo that you can show off to your friends and family!
4. Use a needle to puncture the skin and insert the ink into the skin.
Tattooing is a form of body modification where ink is inserted into the skin to create a design. Tattoos can be done by puncturing the skin with a needle and inserting ink into the skin. The ink is then absorbed by the skin and the design is permanent.
Few safety instructions while using a needle to puncture the skin It is important to be safe when tattooing. Always use a new, sterilized needle when puncturing the skin. Insert the needle into the skin at a 90-degree angle. Do not push the needle too deep into the skin. Go slowly and be careful not to puncture yourself.
5. Use a cotton swab or Q-tip to apply antiseptic to the tattoo area.
Before applying antiseptic to your tattoo, make sure to clean the area with soap and water. Then, using a cotton swab or Q-tip, apply a thin layer of antiseptic to the tattoo area. Be sure to avoid getting any antiseptic on the healthy skin around the tattoo.
The list of the best fruit to practice tattooing on
There is no definitive answer to this question as different people have different preferences. Some people find that apples or bananas work well, while others find that pears or grapes are better. Ultimately, it is up to the individual to experiment with different fruits to see which one works best for them.
Here are 5 fruits recommended for you most people comfortable with this
- Grapes
- Apples
- Pears
- bananas
- strawberries
The Easiest Way To Practice Tattoo Line
Tattoo lines are one of the most important aspects of a tattoo. They need to be clean and straight, otherwise, the tattoo will look messy. The best way to practice tattoo lines is to use a piece of paper and a pen. Draw a bunch of different lines on the paper, then try to tattoo them onto your skin.
Some Important Tips For You
- The first time your practice design won’t be good, so don’t think disappointed in yourself, keep the confidence.
- 6-month duration is too fast for learning so don’t try faster.
- Keep a pencil and draw a paper with yourself. Utilize your lazy time and draw instantly when a new concept will come into your brain.
- Firstly you should try to start with a Rotary Machine. Cause it has less vibration and can be used for multi-operation (Lining and shading)
Some Cautioning
- Don’t deeply insert the needle on the skin.
- Make sure to use natural ingredient-made ink.
- Some black or colorful ink cause allergy problems on sensitive skin. So if your skin is sensitive make sure 100% sure about that.
- Tattoo machines make too much vibration so first time practicing it carefully.
- Don’t try to go drawing by machine on real skin with less knowledge, in a curious mind.
- If you are not too passionate about this, you may need more time to practice to get professional by yourself. So try to take help from a mentor or enroll in live training.
Consultation
“How to practice tattooing” I hope you have gotten the in-depth answer, right? Step by step I’ve guided you as the best tattooist mentor. If you follow my steps on time, I’m promising you, after 6 months later you can draw a tattoo like an expert. Don’t forget to share this post with your friends who love tattooing.